A Comprehensive Guide to Tracking Conversions and Analytics on a GatsbyJS Site

Hanzala
7 min read ⋅ Oct 7, 2023
Introduction:
In today’s data-driven landscape, understanding your website’s performance is crucial. Google Analytics provides insights into user behavior, while conversion tracking allows you to measure the effectiveness of your call-to-actions. Integrating both in a GatsbyJS site can be challenging. Let’s demystify this process with a detailed walkthrough.
Part 1: Implementing Google Analytics on GatsbyJS:
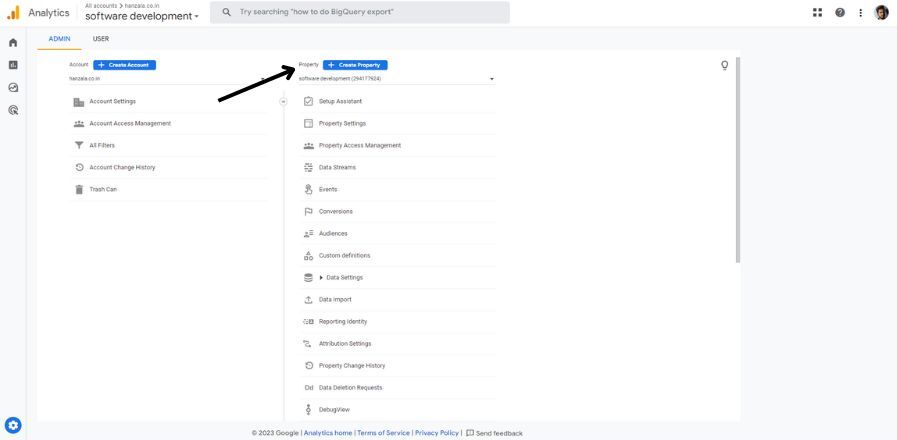
Step 1: Setting Up Google Analytics:
Before you start with Gatsby, you need to ensure you’re equipped with a Google Analytics account.
- Visit the Google Analytics website and sign up or log in.
- Create a new property for your website.
- Locate your Tracking ID—it generally follows the format `
UA-XXXXXXXXX`.
Step 2: Installing the Necessary Gatsby Plugin:
To facilitate the integration, Gatsby offers a specific plugin.
- Open your terminal or command prompt.
- Navigate to your Gatsby project directory.
- Run the following command to install the Google Analytics plugin:
If you're using yarn: yarn add gatsby-plugin-google-analytics
If you're using npm: npm install gatsby-plugin-google-analytics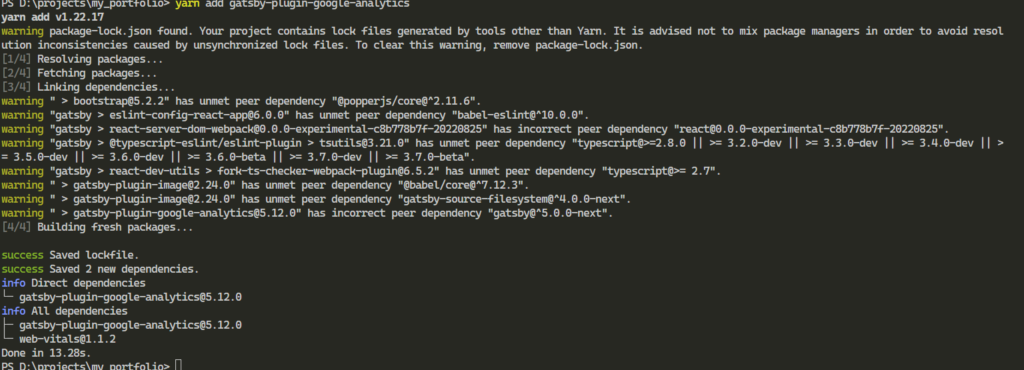
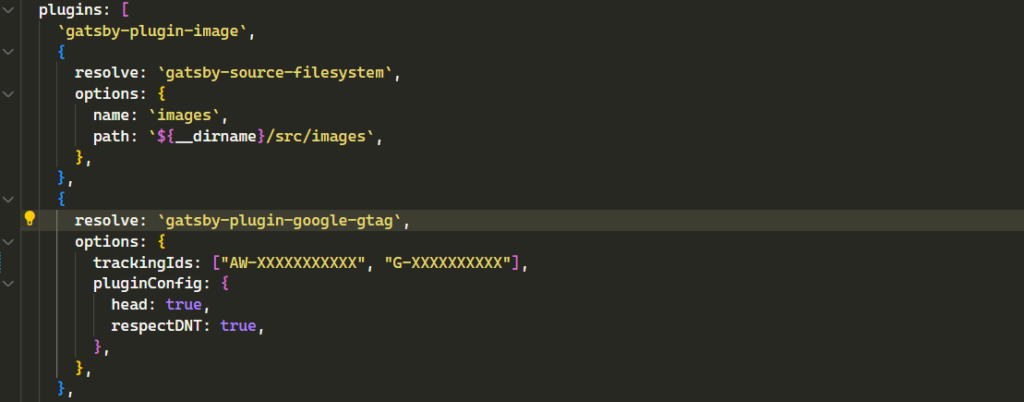
Step 3: Configuring the Plugin:
Now, you’ll integrate the plugin into your Gatsby site.
- Open `
gatsby-config.js` in your preferred code editor. - Add the plugin configuration, ensuring you replace the placeholder with your actual Tracking ID:
module.exports = {
  plugins: [
    {
      resolve: `gatsby-plugin-google-analytics`,
      options: {
        trackingId: "YOUR_GOOGLE_ANALYTICS_TRACKING_ID",
        head: true,
        anonymize: true,
      },
    },
  ],
}
Part 2: Implementing Google Conversion Tracking:
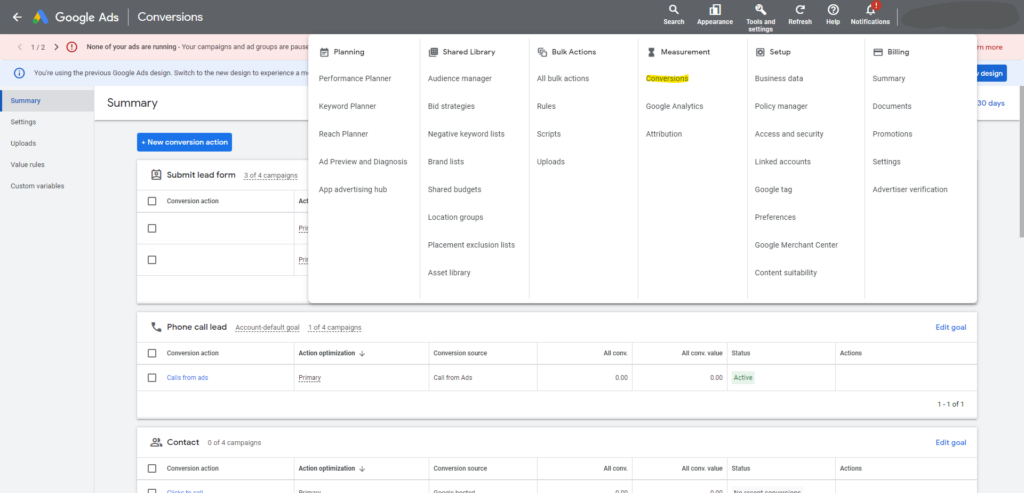
Step 1: Creating a Conversion Action in Google Ads:
Conversion tracking starts by defining the action in Google Ads.
- Log into your Google Ads account.
- Navigate to the ‘Conversions’ section and initiate creating a new conversion action.
- Follow the setup, noting down the global site tag and the event snippet once generated.
Step 2: Integrating the Global Site Tag:
This tag should be present on every page of your website.
- Incorporate this tag into your Gatsby site. One way is to add it to the `gatsby-plugin-google-analytics` configuration in `gatsby-config.js`.
Step 3: Setting Up the Event Snippet for Conversions:
Decide where the conversion should be tracked. This could be a form submission, a button click for a download, etc.
- Incorporate the event snippet using JavaScript, ensuring it’s triggered upon the desired action.
Part 3: Verifying and Testing Your Implementation:
Step 1: Real-time Verification:
Immediately after implementing, you can check if it’s working.
- Visit your website.
- Open Google Analytics and head to the ‘Realtime’ section. You should see your visit.

Conclusion:
GatsbyJS, with its modern architecture, presents unique challenges for traditional tracking setups. However, with the right tools and guidance, ensuring you capture valuable user data and conversion metrics is entirely feasible. By following this guide, you’re well on your way to harnessing the full power of your site’s analytics.
Do you have questions or need further clarification? I’m here to help. Email me anytime at justhanzala786@gmail.com.